


Table of Contents
◉ Introduction ◉ Definitions & Context ◉ Technique 1 ◉ Technique 2 ◉ Technique 3 ◉ Technique 4 ◉ Technique 5 ◉ Pros & Cons ◉ Mini Case Study ◉ Common Mistakes & Tips ◉ FAQs ◉ Conclusion
Introduction
Photoshop Adjustment-layer stack can feel like a labyrinth: Gradient Maps, Curves, Blend-If sliders—each powerful, yet easy to misuse. That’s why the five “hidden” techniques packed into Art’s recent YouTube tutorial are worth a deep dive. You’ll learn how to paint neon glows with a single brush stroke, extract wispy smoke without Screen mode, cast mirror-smooth water reflections, pour liquid gold onto skin, and generate infinite foliage inside Photoshop—all in one sitting. The payoff is speed and creative range: imagine transforming a bland product shot into a cinematic scene before your coffee goes cold. Adobe Creative Cloud now counts roughly 32.5 million paying subscribers—all potential competitors fighting for eyeballs (PhotoTutorial, 2025). Master these five workflows and you jump a notch ahead.
Definitions & Context
• Gradient Map: An Adjustment layer that remaps tonal values (brightness) to colors across a custom gradient.
• Blend-If: A Layer Style option that hides pixels based on underlying luminance, enabling complex compositing without masks.
• Motion Blur: A Blur filter that smears pixels along a specified angle and distance, simulating movement or water smear.
• Filter Gallery: A legacy hub for artistic filters like Plastic Wrap and Chrome—indispensable for stylized textures.
• Procedural Tree Render: A JavaScript-driven filter (Render → Tree) that spawns vector-based foliage with full lighting controls.
🎨 Don’t have Photoshop yet?
Get the full version FREE for 7 days and follow every technique step-by-step.
Download Free Trial
Get the full version FREE for 7 days and follow every technique step-by-step.
Download Free Trial
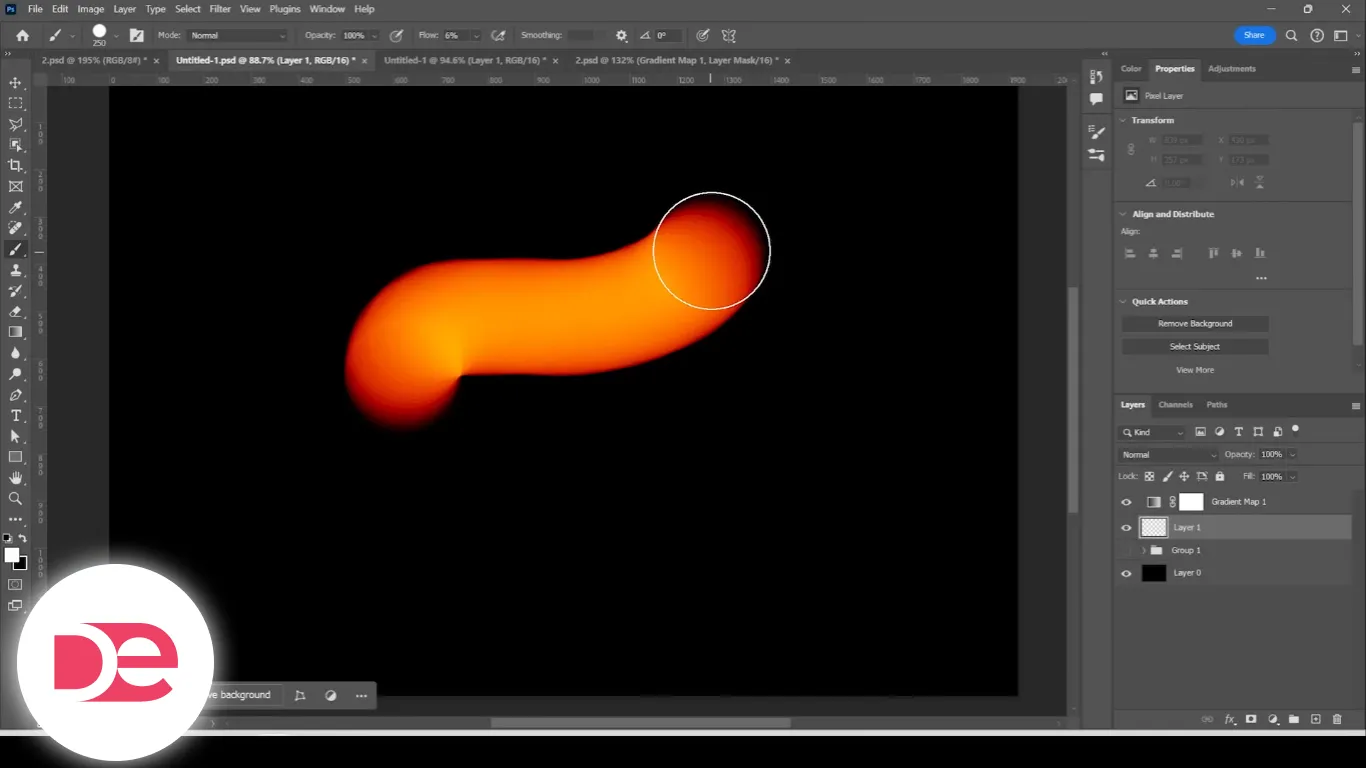
Technique 1: Gradient-Map Brush Glows
1. Add a Gradient Map over your base image.
2. Define three color stops—bright yellow for 100 % white, orange mid-tones, deep red shadows.
3. Insert a blank layer between the Gradient Map and the image; fill it with 100 % black.
4. Change the black layer’s Blend Mode to Screen (only bright pixels survive).
5. Select a soft round Brush at *low Flow* (≈ 6 %) and paint white strokes on a new layer clipped below the Gradient Map.
6. Toggle X to paint black for erasing and refine the glow edge.
Result: A controllable neon streak that inherits hue directly from the Gradient Map.
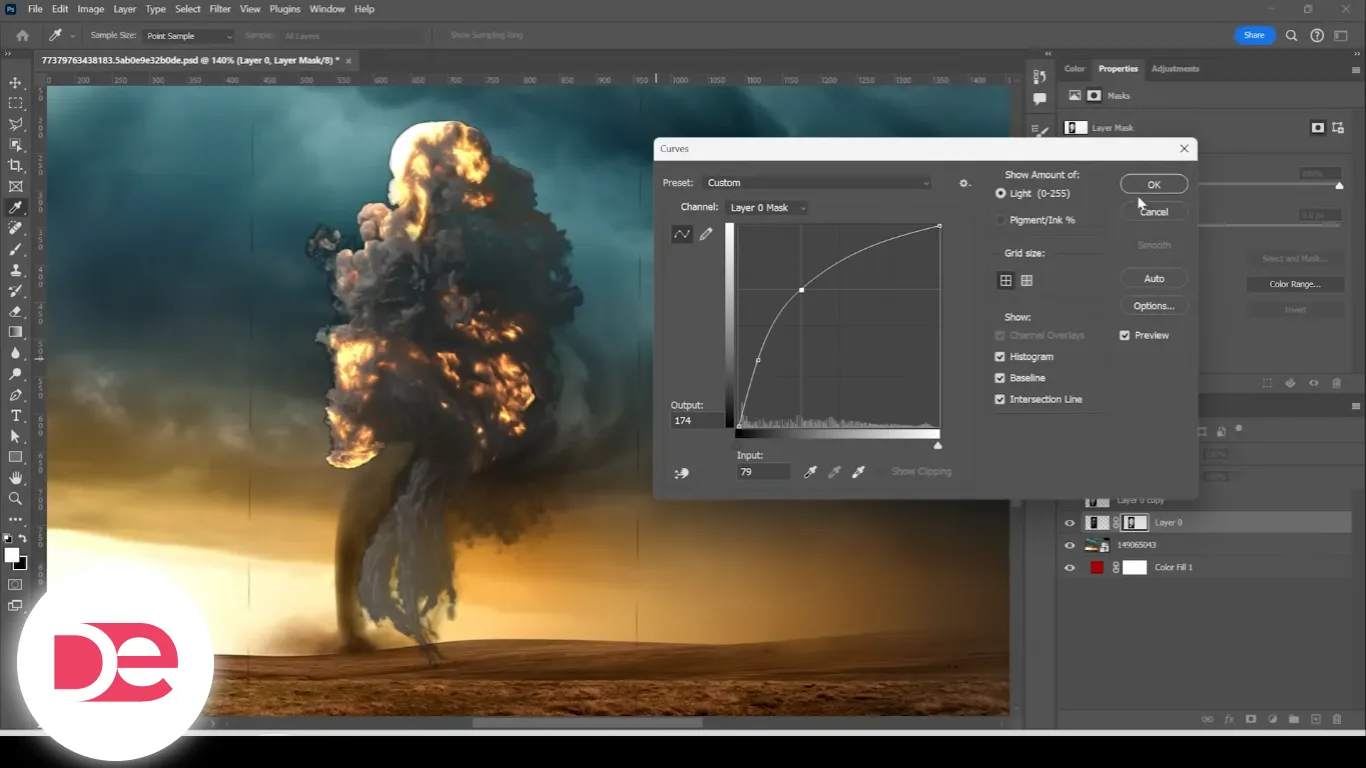
Technique 2: Smoke & Cloud Extraction Without Screen Mode
1. Duplicate the cloud layer; hit Ctrl + U → Desaturate.
2. Ctrl + M (Curves) → crank whites, crush blacks until only smoke remains.
3. Select All (Ctrl + A) → Copy (Ctrl + C).
4. Add a Layer Mask to the original cloud layer; Alt-click the mask and Ctrl + Shift + V to paste.
5. Alt-click back; fine-tune with Curves on the mask for perfect opacity falloff.
Why it works: You’re converting brightness into alpha, preserving mid-tone whorls that Screen mode would obliterate.
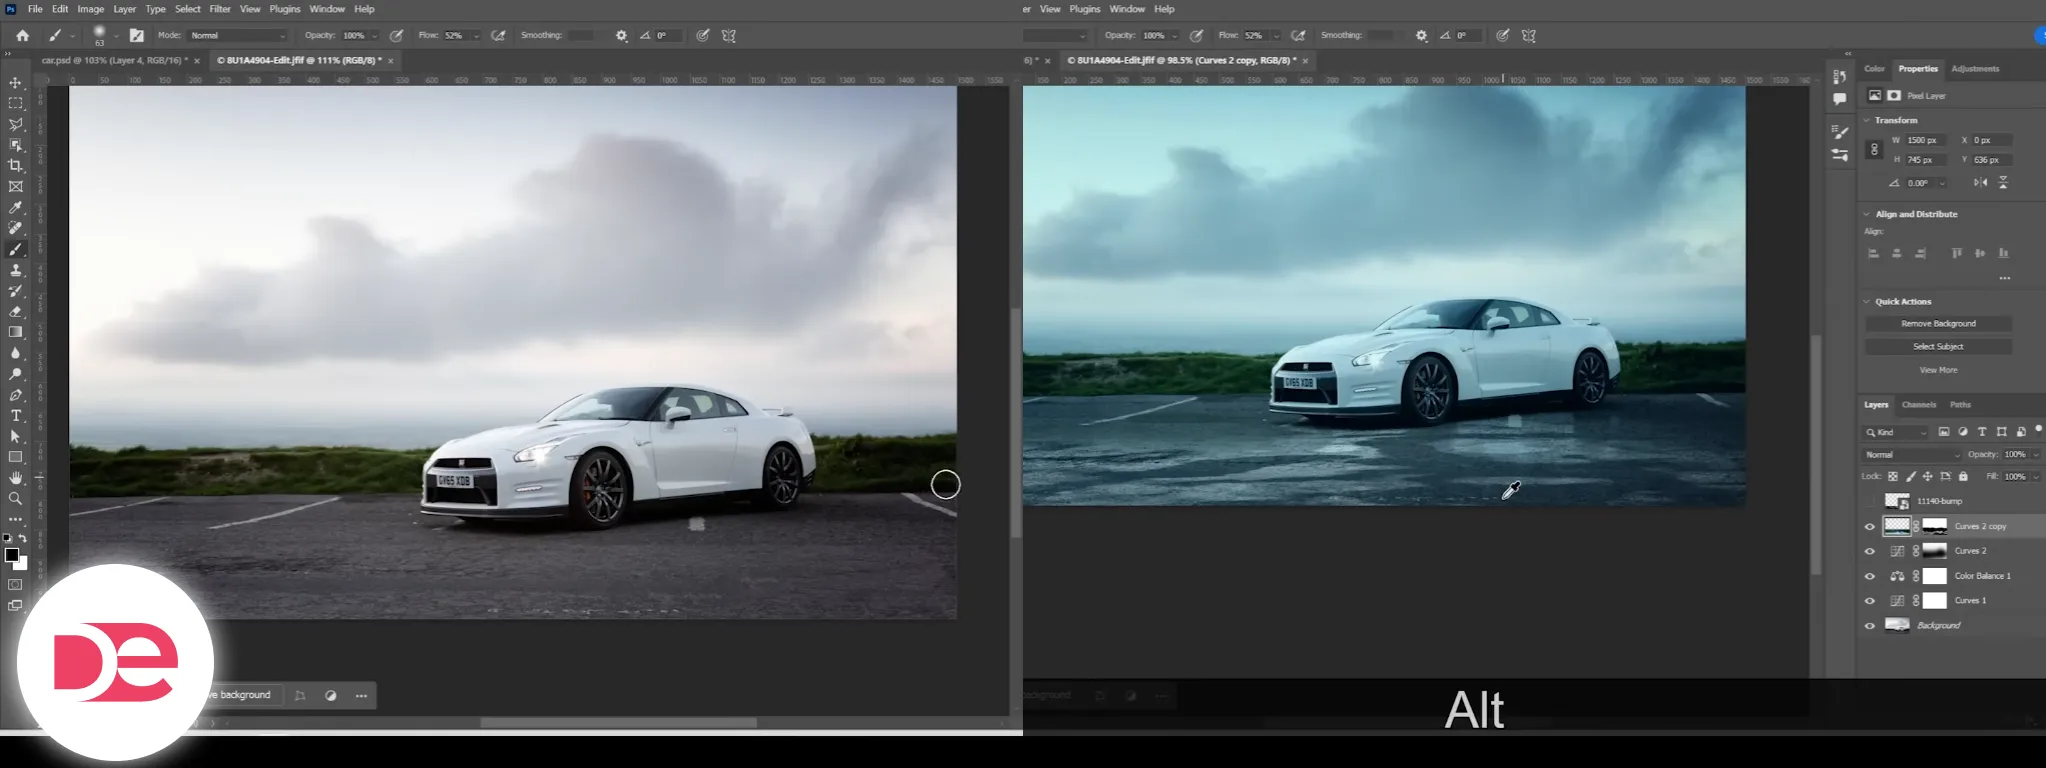
Technique 3: Hyper-Real Water Reflection
1. Merge a snapshot of the retouched car (Ctrl + Shift + Alt + E).
2. Ctrl + T → Flip Vertical; drag to the ground line; compress height slightly to match perspective.
3. Apply Filter → Blur → Motion Blur (Angle = 90°, Distance≈ 25 px).
4. Create a Layer Mask and paint black over horizon to fade into distance.
5. For ripples, import a grayscale bump map (clouds), Distort to ground plane, copy its luminosity into the reflection mask as in Technique 2.
6. Optional: Use Blend-If to hide darkest areas for puddle gaps.
Result: A reflection that tracks scene lighting without third-party plugins.
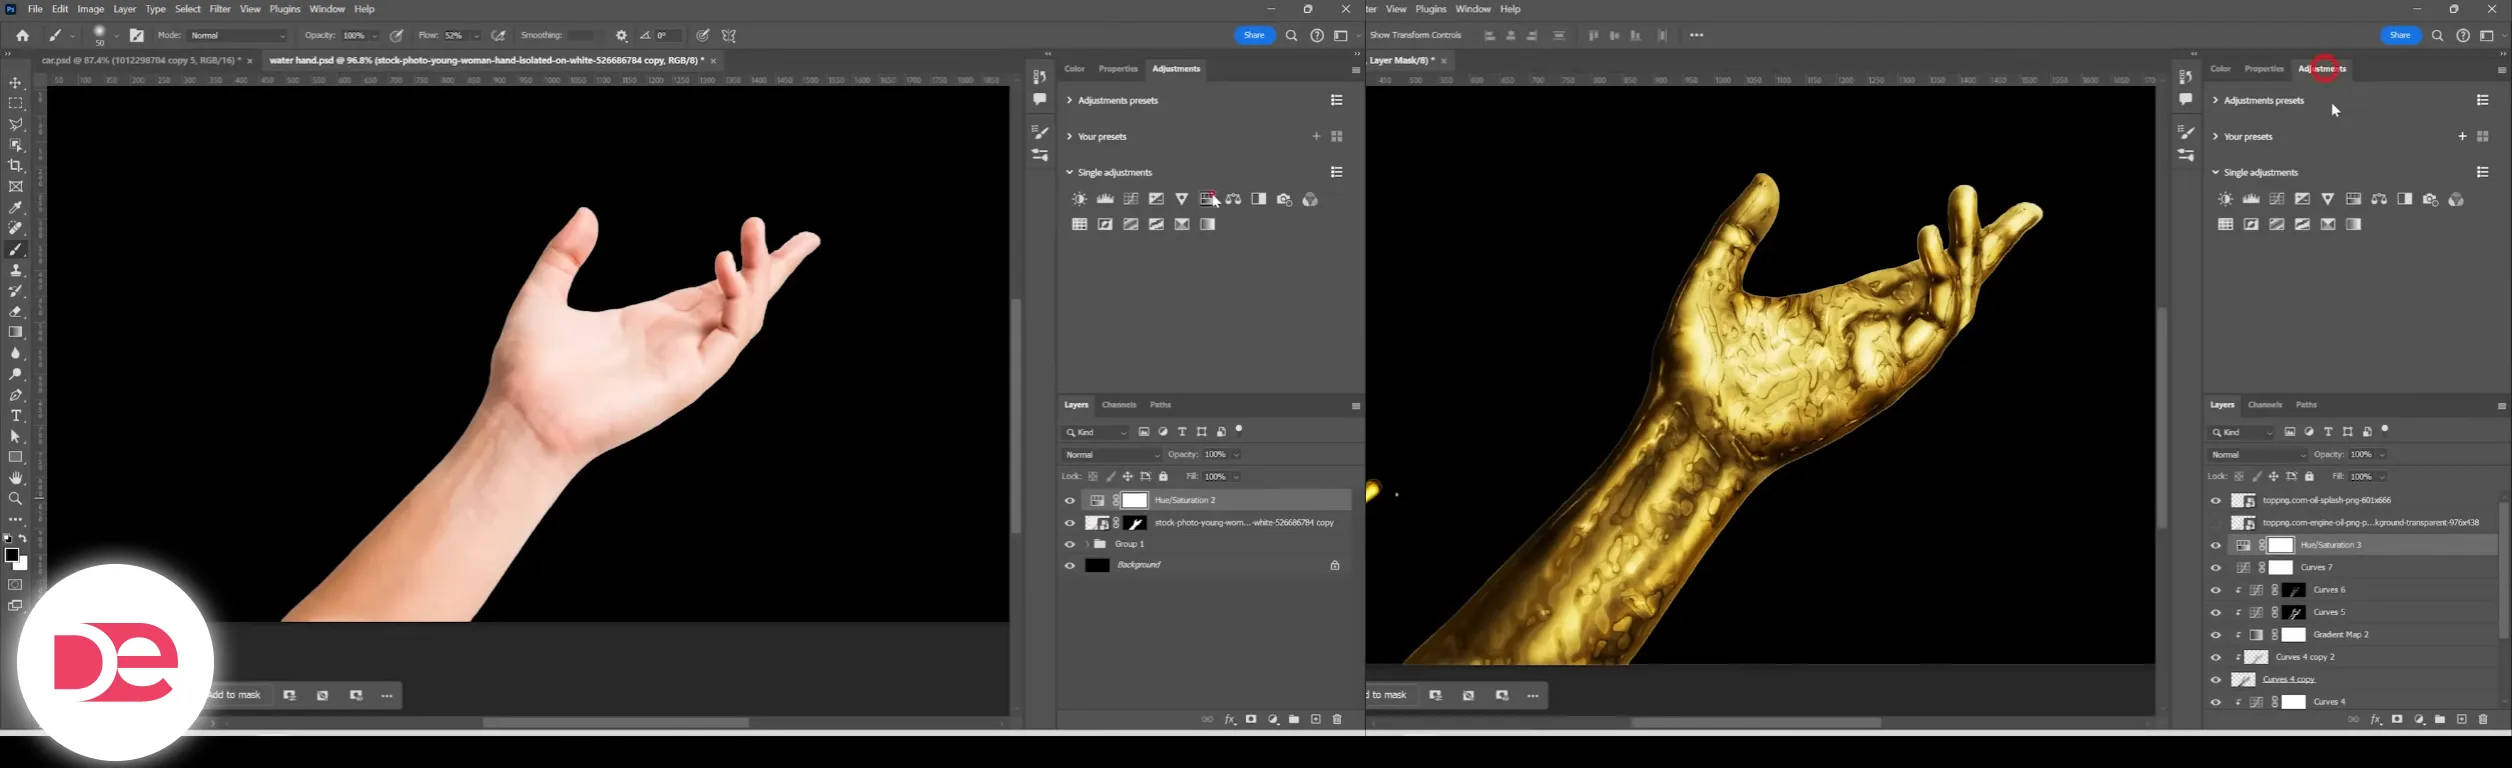
Technique 4: Liquid-Gold Skin Finish
1. Desaturate the hand layer (Ctrl + Shift + U).
2. Add a Curves Adjustment, boost contrast for 3-D depth; clip to the hand.
3. Merge those edits; open Filter Gallery → Artistic → Plastic Wrap, dial Highlight Strength ≈ 15, Smoothness ≈ 10.
4. Duplicate; Filter Gallery → Sketch → Chrome to emboss metallic ridges.
5. Set the Chrome layer to Multiply to darken crevices.
6. Clip a Gradient Map—deep umber shadows, mid burnt-orange, pale gold highlights.
7. Finish with two Curves layers for dodge & burn (mask-in highlights and shadows).
Pro tip: Add a Hue/Saturation layer above the Gradient Map to swap gold for sapphire water without re-painting.
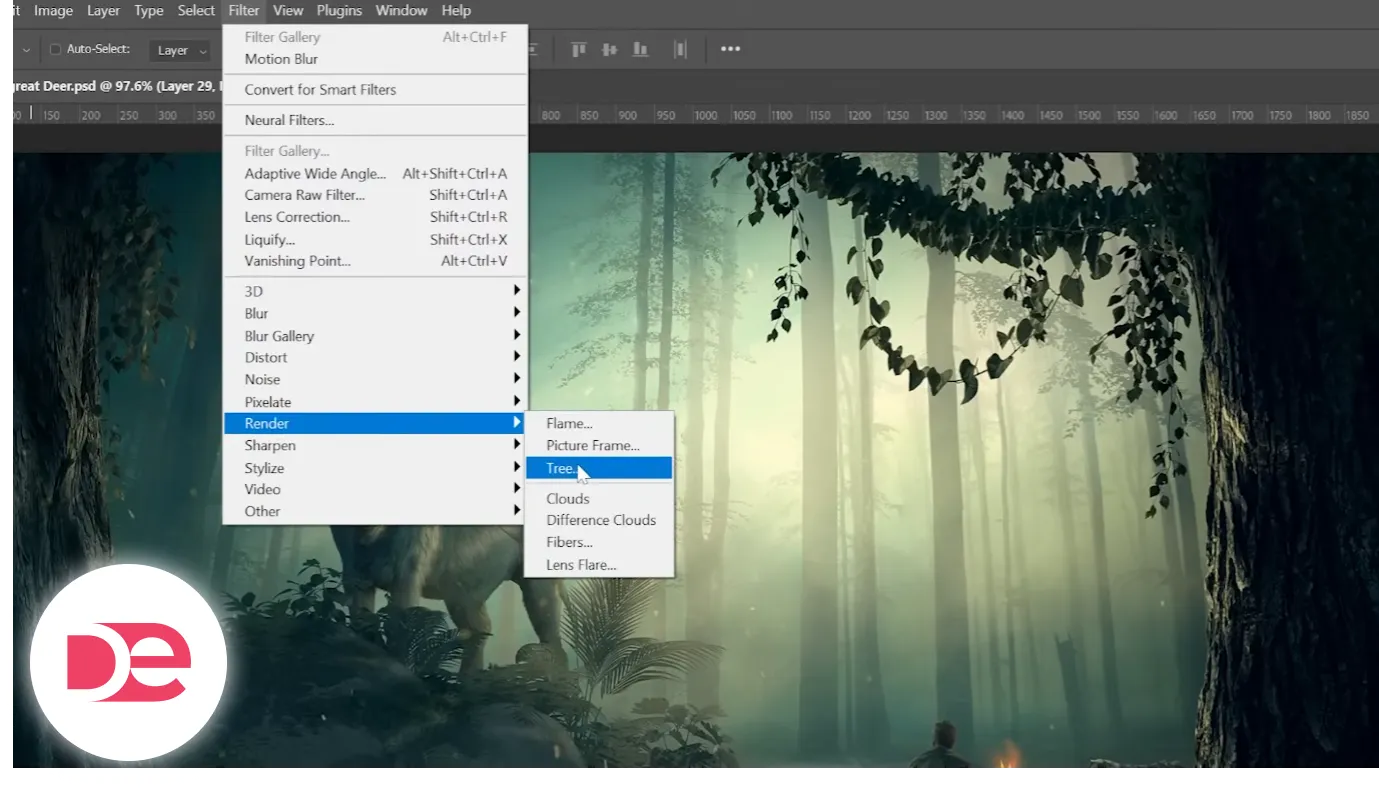
Technique 5: Infinite Foliage with Render → Tree
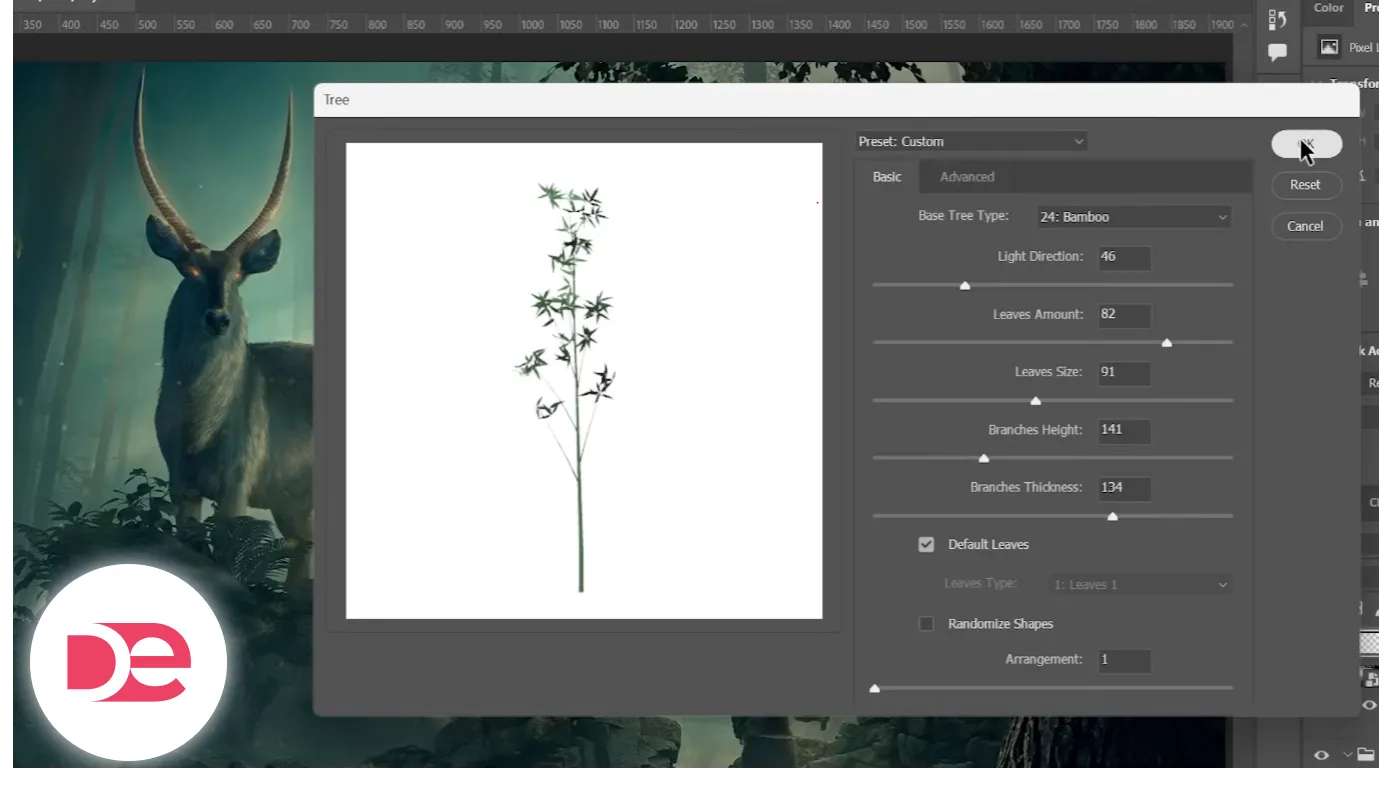
1. New Layer → Filter → Render → Tree.
2. Pick a species (e.g., Japanese Maple), tweak Leaf Amount and Light Direction to match scene.
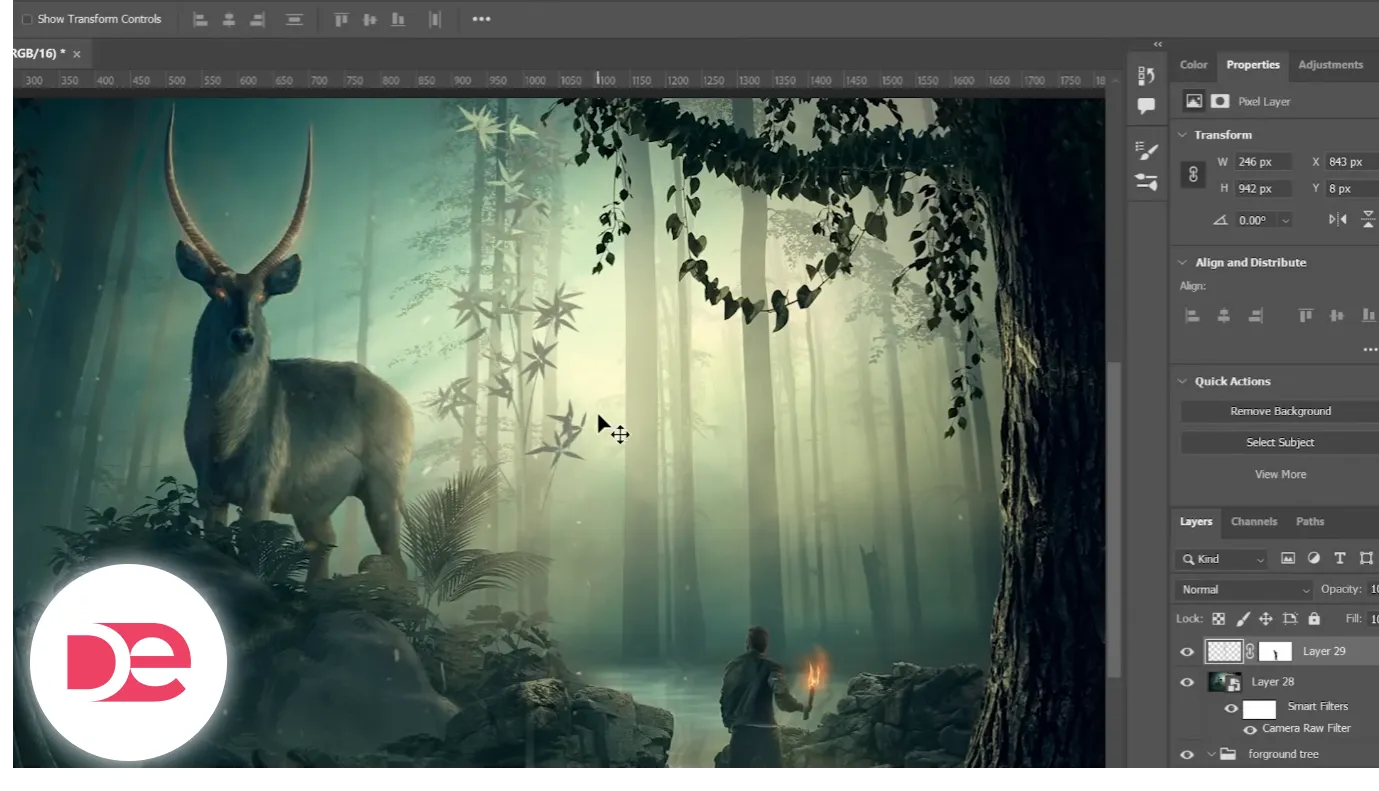
3. Position in low-detail background zones; add a mask and softly erase trunk overlaps.
4. Use Hue/Saturation to shift greens for atmospheric depth.
Why it’s a game-changer: You carry an on-demand stock library inside Photoshop—no asset hunt required.
Pros, Cons & Risk Management
• Speed: All five tricks rely on native tools—zero plug-in overhead.
• Non-destructive: Adjustment layers keep edits reversible; save PSDs with layer comps for A/B tests.
• Learning curve: Blend-If and Curves masks can confuse newcomers; label each layer clearly.
• Color accuracy: Gradient-Maps can clip gamut on wide-gamut monitors; enable Proof Colors (View → Proof Setup → sRGB) before export.
• Hardware load: Motion Blur and Filter Gallery are CPU-bound; preview at 50 % zoom to avoid lag.
Mini Case Study: 10-Minute Automotive Composite
| Trick | Role in Final Image | Time Saved |
|---|---|---|
| Gradient-Map Glow | Adds neon light trails along headlights | 2 min |
| Smoke Extraction | Overlays tire smoke without erasing highlights | 3 min |
| Water Reflection | Mirrors sky and car body on wet asphalt | 3 min |
| Liquid-Gold | Applies to logo badge for premium accent | 1 min |
| Render → Tree | Fills empty horizon with foliage | 1 min |
Common Mistakes & Expert Tips
• Over-saturated Gradients: Keep mid-tone saturation ≤ 60 % to avoid banding.
• Ignoring Mask Density: In Techniques 2 and 3, view the mask in Quick Mask (Q) to spot unintended gray pixels.
• Neglecting Color Harmony: Use Global Color in Camera Raw Filter post-composite to unify tones.
• Forgetting Smart Objects: Convert reflection and gold-skin layers to Smart Objects so you can tweak filters later.
• Skipping Proof Test Prints: Metallic effects often print darker; compensate by bumping exposure +0.3 EV before export.
FAQs
Conclusion
By layering Gradient Maps, Curves masks, and a handful of well-chosen filters, you unlock cinematic results without leaving Photoshop’s native toolkit. Set aside one afternoon to practice each technique—use the timestamps above as checkpoints, then bookmark this guide for future reference. The next time a client needs “something special” on a same-day deadline, you’ll have five battle-tested tricks ready to deploy.
Elevate Your Creations with Adobe Photoshop →


