


Affiliate disclosure: This article contains affiliate links. If you click and purchase, we may earn a commission at no extra cost to you.
Table of Contents
◉ Overview ◉ What you’ll need before you start ◉ The big change: Generative Fill model choice ◉ Rotate a subject without a reshoot ◉ Outfit and styling changes workaround ◉ Text edits that don’t fall apart ◉ Select Subject on-device improvements ◉ Faster, cleaner Remove tool ◉ Dynamic Text ◉ Generative Upscale with partner models ◉ Harmonize for composites ◉ Generation history on Home ◉ Photoshop Beta: Fill/Expand model ◉ Mini case study workflow ◉ Troubleshooting ◉ Limitations and safeguards ◉ FAQ ◉ Next steps
Photoshop 2026 (technical release version 27) expands what you can do with AI—especially when you need realistic edits that stay consistent with the original subject. The biggest shift is that Generative Fill can now run on more than one model family, including “partner models” designed for specific strengths like character consistency or accurate text edits. At the same time, everyday tasks get meaningfully better: on-device Select Subject is far more reliable, the Remove tool is faster with fewer odd substitutions, and type layout gains a new “Dynamic Text” option that can save you from manual kerning and resizing.
This tutorial shows you how to choose the right model for the job, when to use on-device vs. cloud processing, how to avoid common AI failure modes (like unexpected artifacts), and how to build a repeatable workflow for portraits, composites, marketing graphics, and restoration. By the end, you’ll be able to decide which features are worth your time and generative credits, and you’ll have step-by-step recipes you can apply immediately.
Don’t have Photoshop yet?
Grab Photoshop so you can follow this guide step-by-step and try the new AI workflows on your own images.
Get PhotoshopWhat you’ll need before you start
• Photoshop 2026 installed (version 27) via the Creative Cloud desktop app
• An Adobe account with access to generative features (availability can vary by region)
• A few test images (portrait, product shot, composite background, and a low-resolution scan if you want to try upscale)
• Optional: Photoshop Beta installed separately (for the experimental Fill/Expand model)
Quick check (important): In Photoshop, confirm you’re on the 2026 release line and that your technical version reads 27. If you don’t see the features described here, update in Creative Cloud and restart Photoshop.
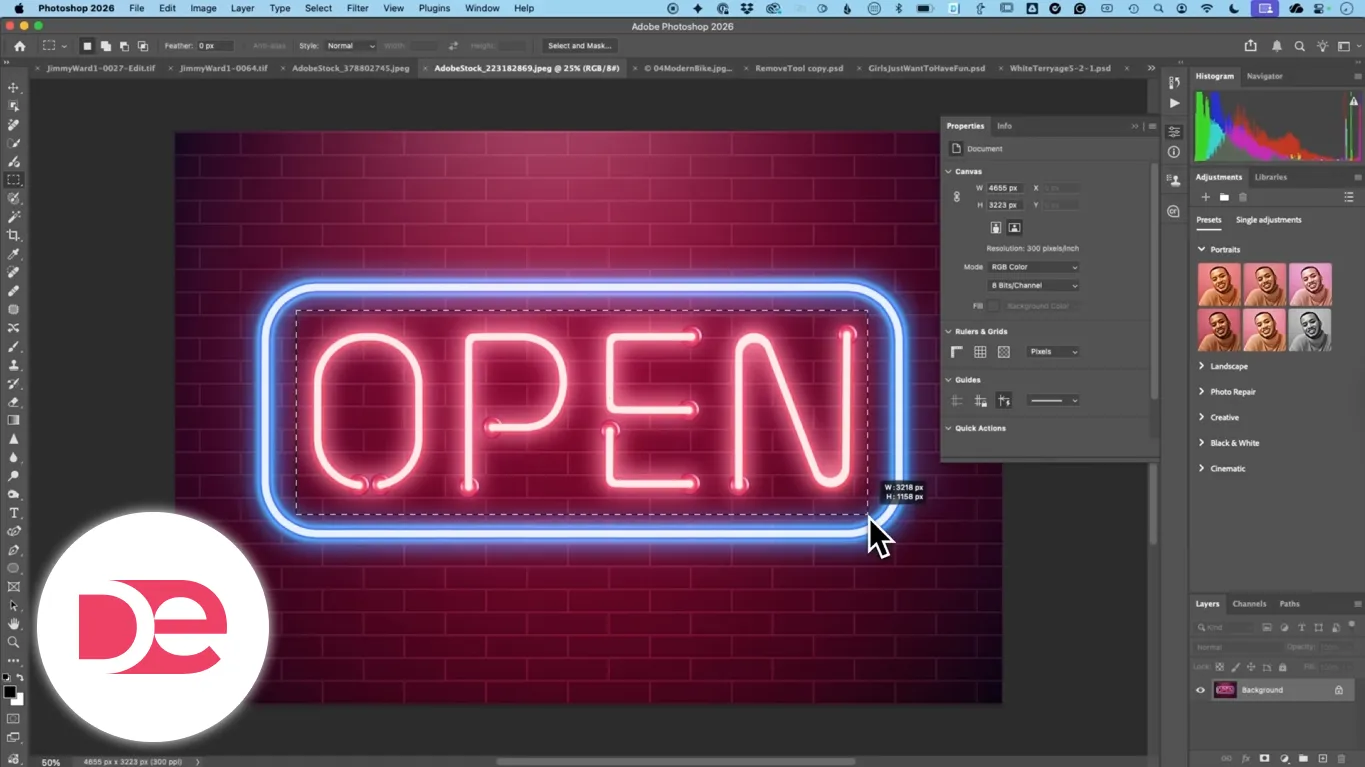
The big change: Generative Fill now lets you pick the model
Generative Fill isn’t just “one AI” anymore. You can select from Adobe’s Firefly models and, in some cases, partner models. Practically, this matters because different models behave differently:
• Some are better at character consistency (keeping a person’s identity stable while changing pose or viewpoint)
• Some are better at editing text on signs or packaging
• Some may provide fewer variations per generation
• Some may consume more generative credits per use
Firefly vs partner models: a decision snapshot (use this table once, then rely on the workflows below)
| Goal | Best first choice | What you’ll trade off |
|---|---|---|
| General scene additions, background extensions, broad edits | Firefly models | Usually more variations; may struggle with strict identity consistency |
| Rotate or re-orient a person while keeping them recognizable | Partner model focused on consistency (e.g., Gemini 2.5 Nano Banana) | Often fewer variations; higher credit cost |
| Change or preserve lettering accurately (signs, labels) | Partner model geared for text (e.g., Flux Context Pro) | Higher credit cost; still verify typography details |
| Try improved Fill/Expand behavior with multiple variations | Photoshop Beta experimental Fill/Expand model | Experimental artifacts can appear; reporting issues is part of the process |
Get more consistent AI edits in Photoshop (rotate subjects, cleaner removals, better text)
Follow the workflows in this tutorial with the latest Photoshop release and test partner models, on-device selection, and upgraded tools on your own images.
Try PhotoshopStep-by-step: Use partner models to rotate a subject without a reshoot
One of the most practical upgrades is the ability to turn a person or change their viewing angle in a way that stays believable. Previously, this often meant re-shooting. Now you can attempt it directly—especially when you choose a model known for consistency.
Workflow A: Turn a subject forward while preserving a pose
1) Open the image and make a selection that includes the subject you want to adjust.
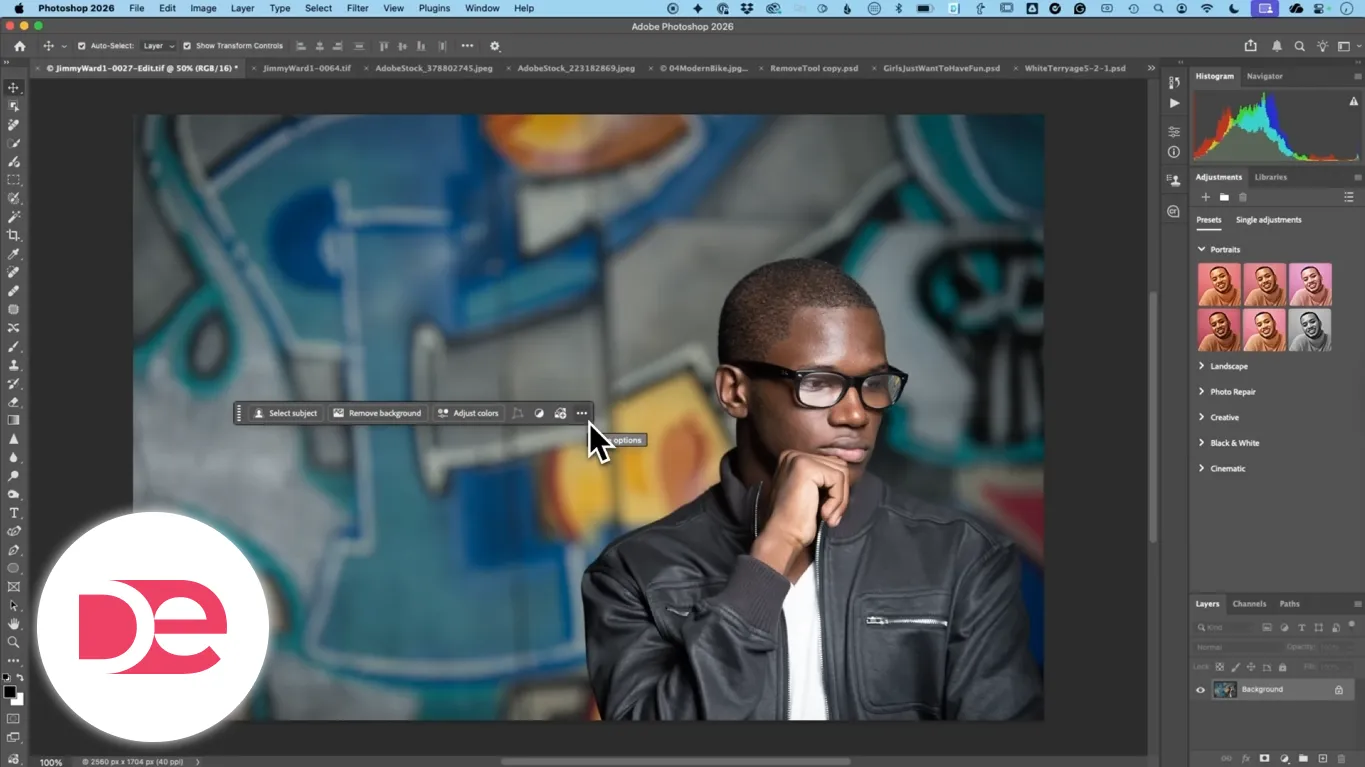
2) Choose Generative Fill (Contextual Task Bar or menu path depending on your workspace).
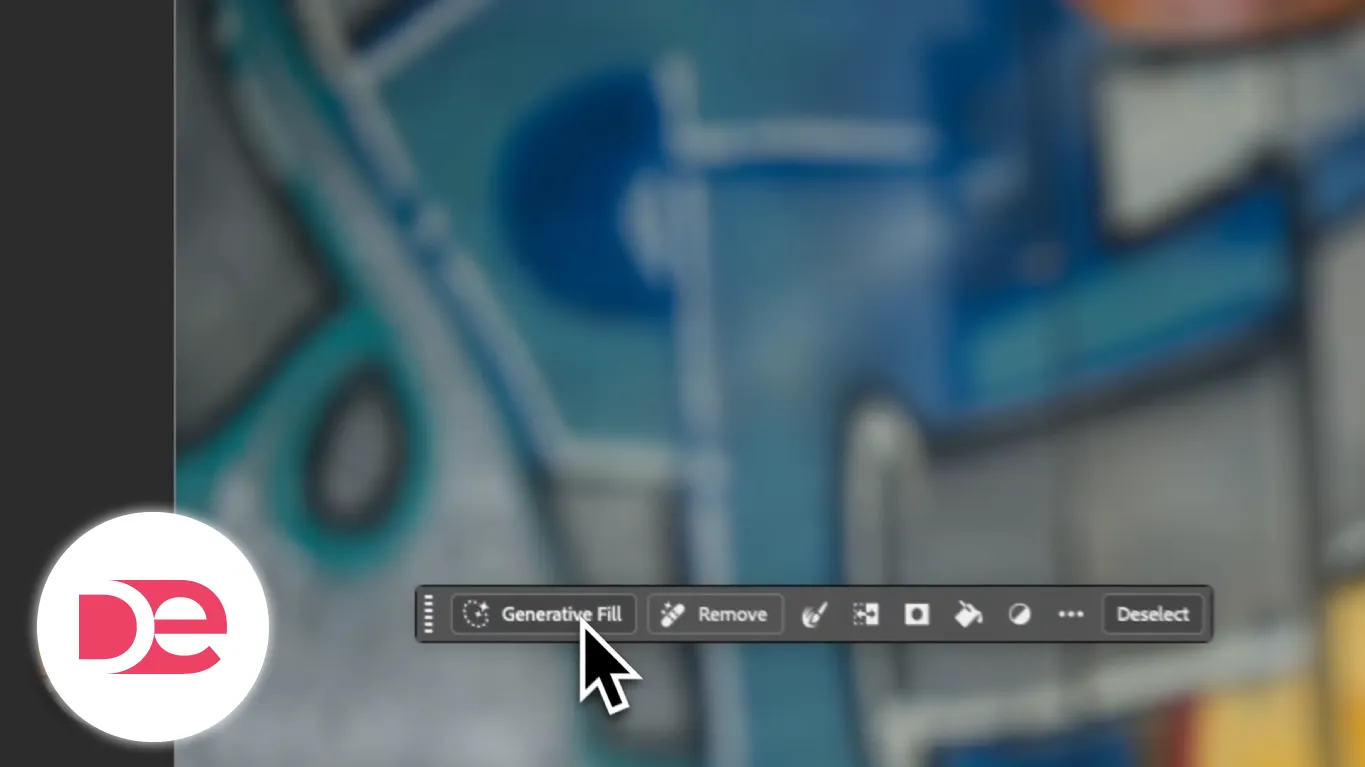
3) In the model picker, select a partner model aimed at character consistency.

4) Use a prompt that specifies two constraints:
• The directional change you want (e.g., “turn him forward”)
• What must remain stable (e.g., “maintain hand position”)
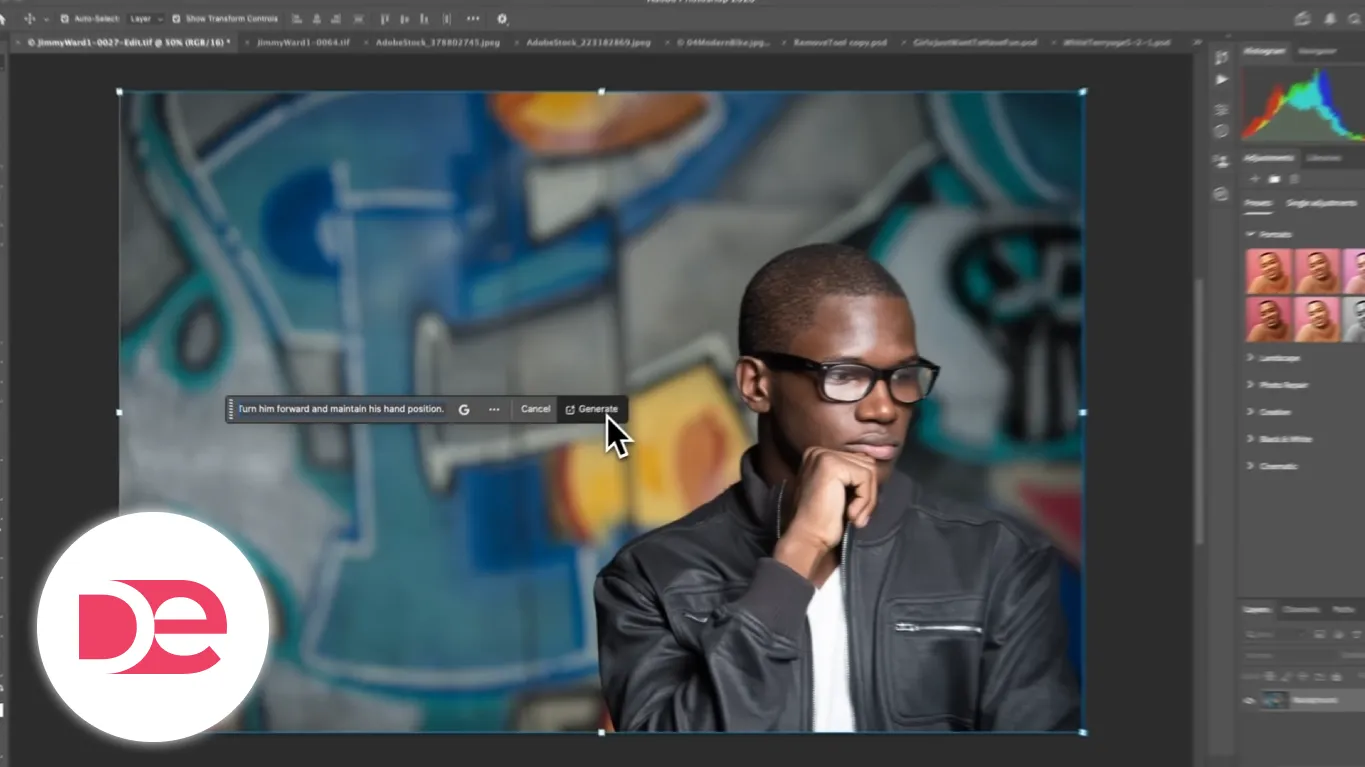
5) Generate, then review the result as a new layer.
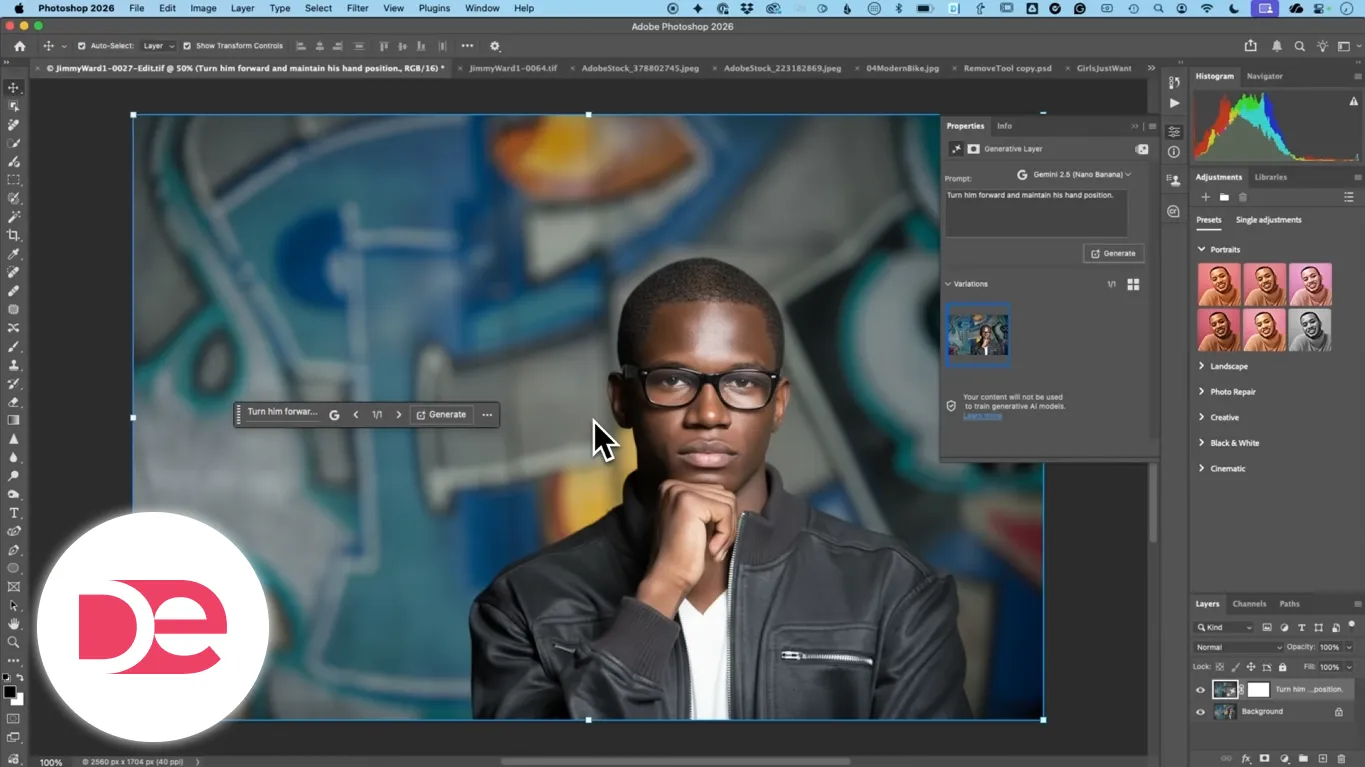
How to evaluate the output (don’t skip this):
• Check the face shape, hairline, and key identifying features
• Zoom into hands and fingers (common weak spot)
• Look for background drift (wall art or objects shifting slightly can happen)
Workflow B: Change perspective (top-down / angled views) for dramatic framing
This is useful for creative marketing shots, faux “drone” angles, and stylized editorial looks.
1) Select the full frame or the subject area (depending on whether you want the entire scene to shift).
2) Use Generative Fill with a partner model.
3) Prompt for a specific camera angle (for example, “top-down 45-degree angle”).
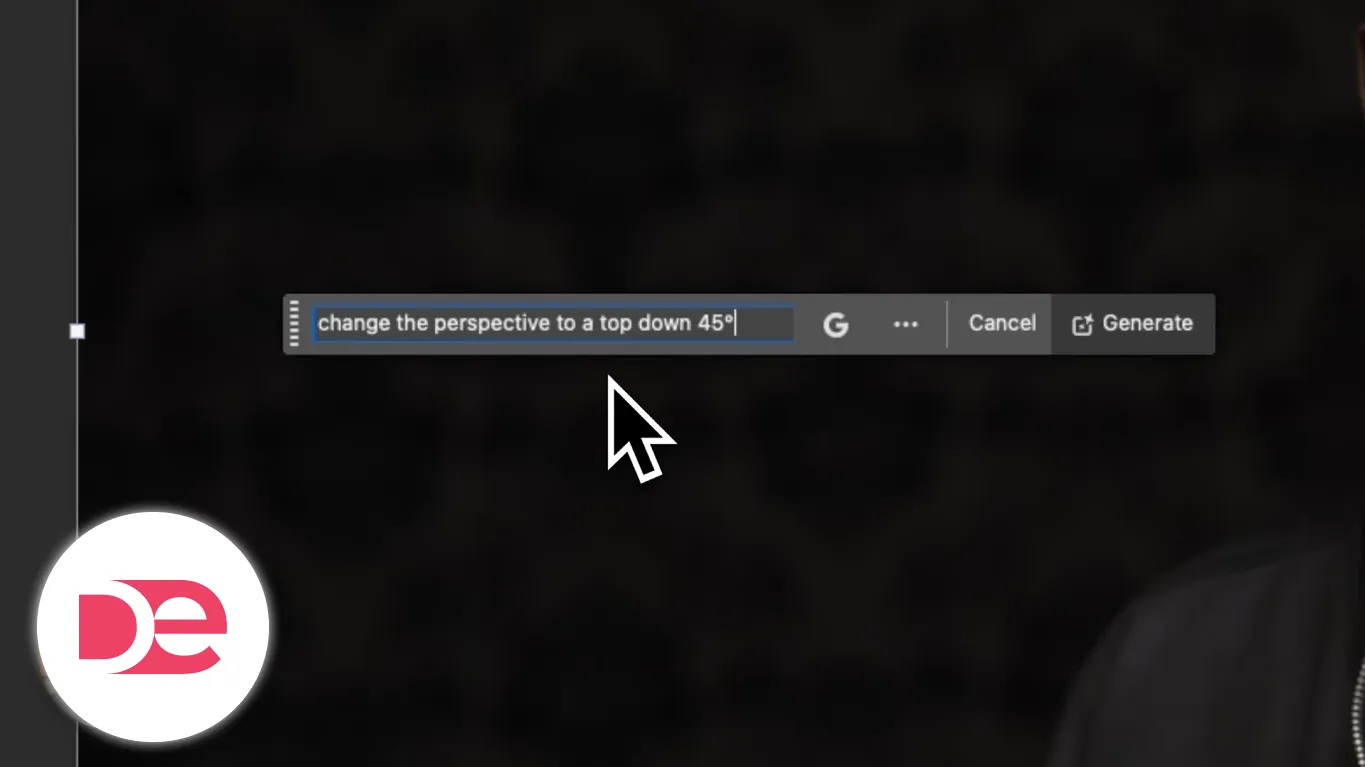
4) Generate and inspect edges, shadows, and geometry.
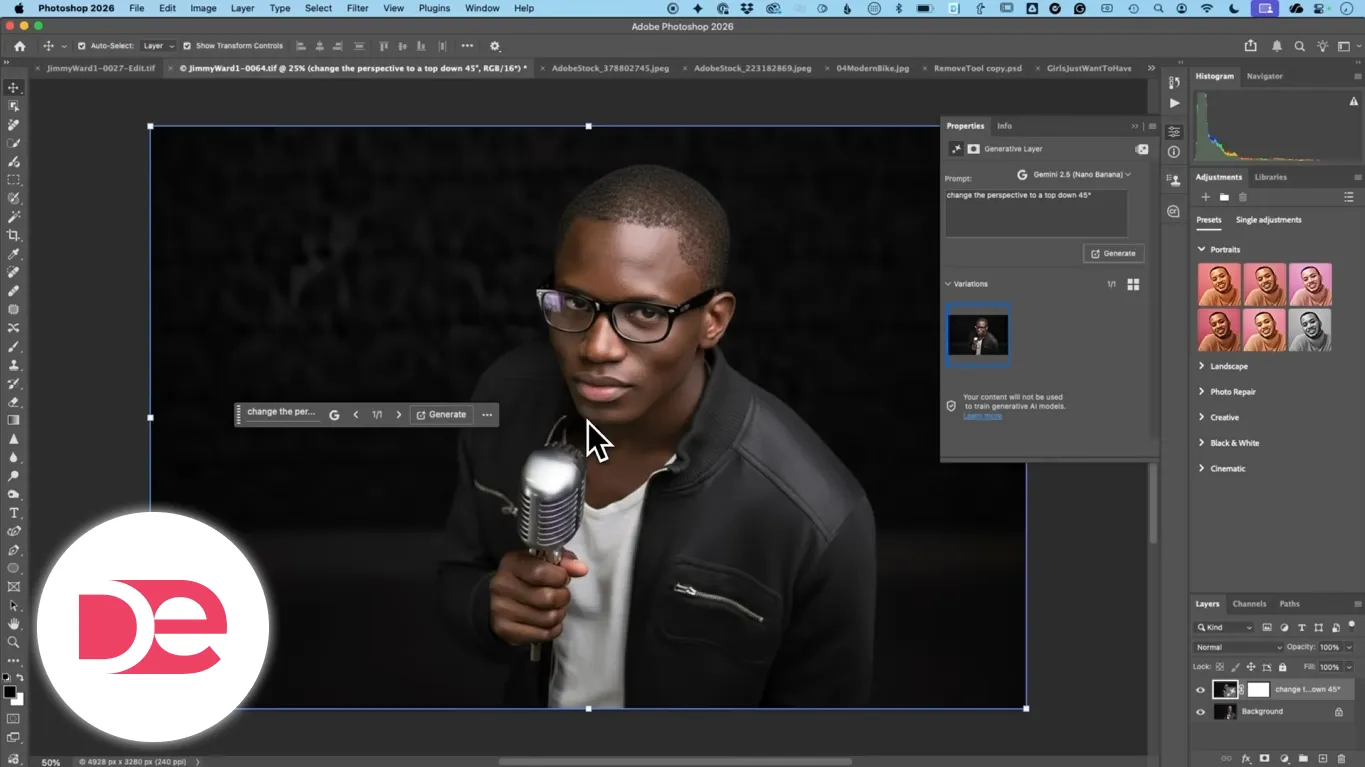
Pro tip: The more your prompt resembles a camera instruction (angle, viewpoint, lens-like framing), the more predictable your result tends to be.
Outfit and styling changes without a formal reference input
At the time of writing, Generative Fill may not provide a dedicated “reference image” input in the way some standalone generators do. A practical workaround is to bring your inspiration into the canvas and let the model infer from context.
A reliable “on-canvas reference” method
1) Open your base photo (the person).
2) Drag a second image into the same document—your outfit or styling inspiration.
3) Scale and position the reference so it’s visible, but it doesn’t need to be perfect.
4) Select the full canvas (or the subject area if you want to constrain changes).
5) Run Generative Fill and explicitly instruct what to change (e.g., “change the clothes of the woman sitting on the stool”).
6) If key items matter (boots, sunglasses, bag), name them in the prompt.
What to expect:
• You may get a strong overall wardrobe shift, but some items may not match perfectly
• Accessories can be inconsistent unless you specify them
• Some partner models may deliver only one variation, so “prompt precision” matters more than “pick the best of three”
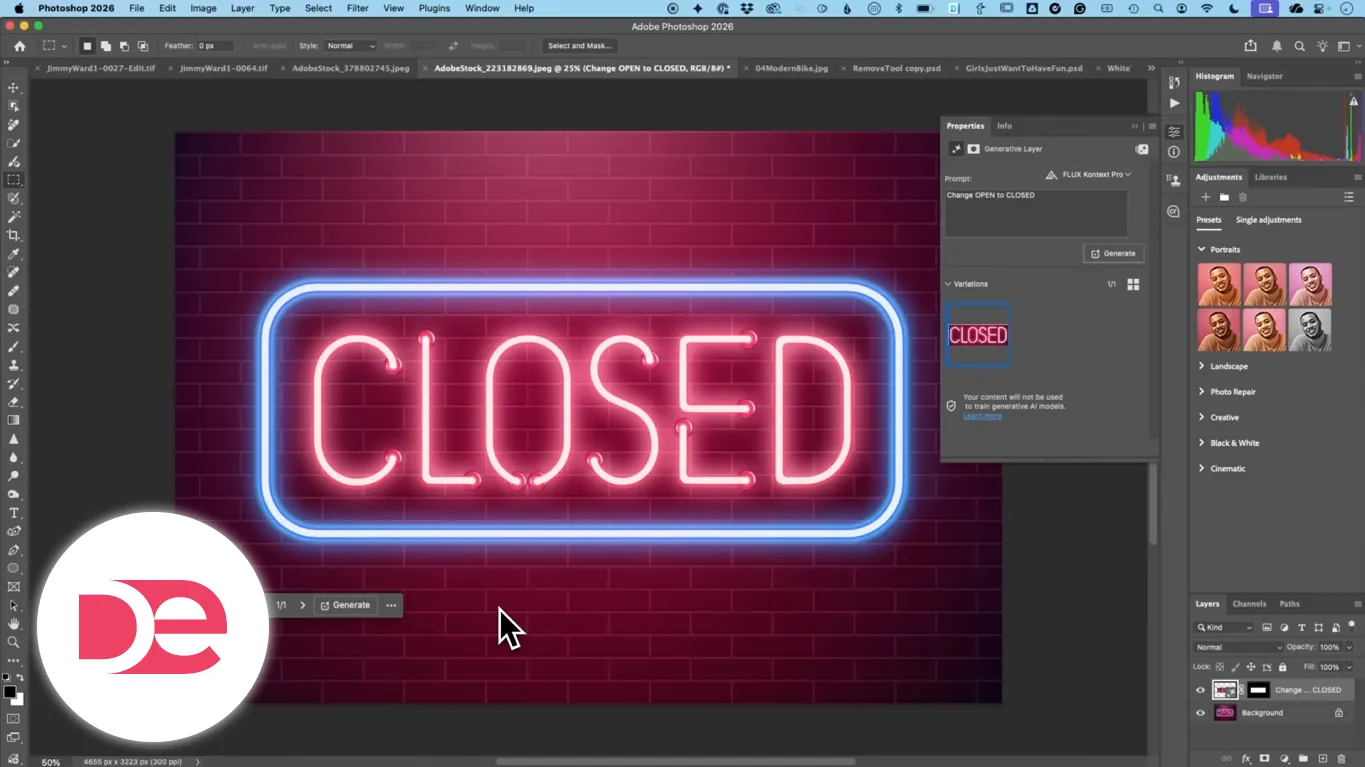
Text edits that don’t fall apart: when to switch to a text-focused model
If you’ve ever tried to change a sign from “OPEN” to “CLOSED,” you know the pain: mismatched letterforms, spacing issues, or gibberish characters. A partner model designed for text changes can dramatically reduce that friction.
Workflow: Edit a sign or label with fewer manual rebuilds
1) Select the sign area (tight selection is better for typography).
2) Switch Generative Fill to a model known for text handling (e.g., Flux Context Pro).
3) Prompt with the exact replacement text: “change OPEN to CLOSED.”
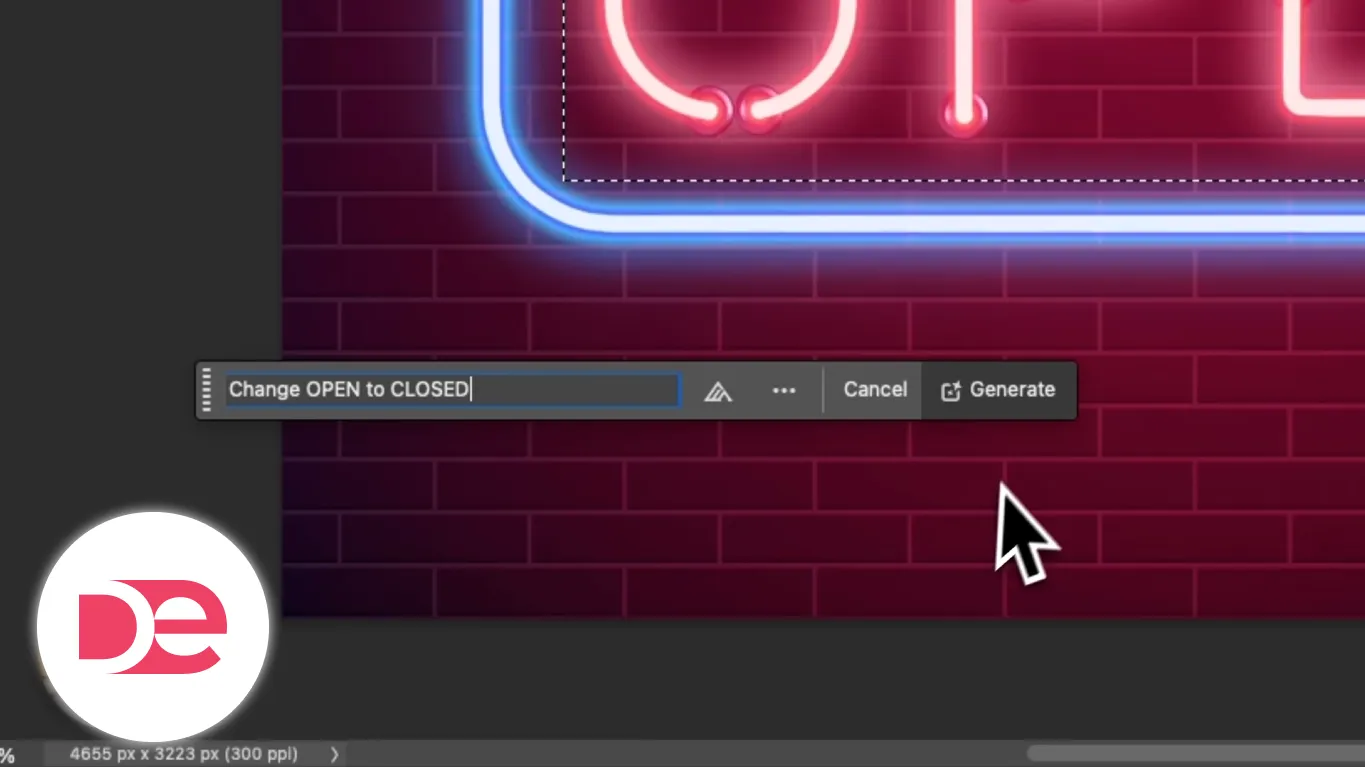
4) Generate, then zoom in to confirm:
• Letter spacing (kerning)
• Stroke thickness consistency
• Perspective matching
When you should still do it manually:
• Brand-critical packaging
• Legal or compliance text
• Anything that must match a specific font exactly
A good hybrid approach is to use AI for the base sign texture and lighting, then rebuild final lettering with real type layers.
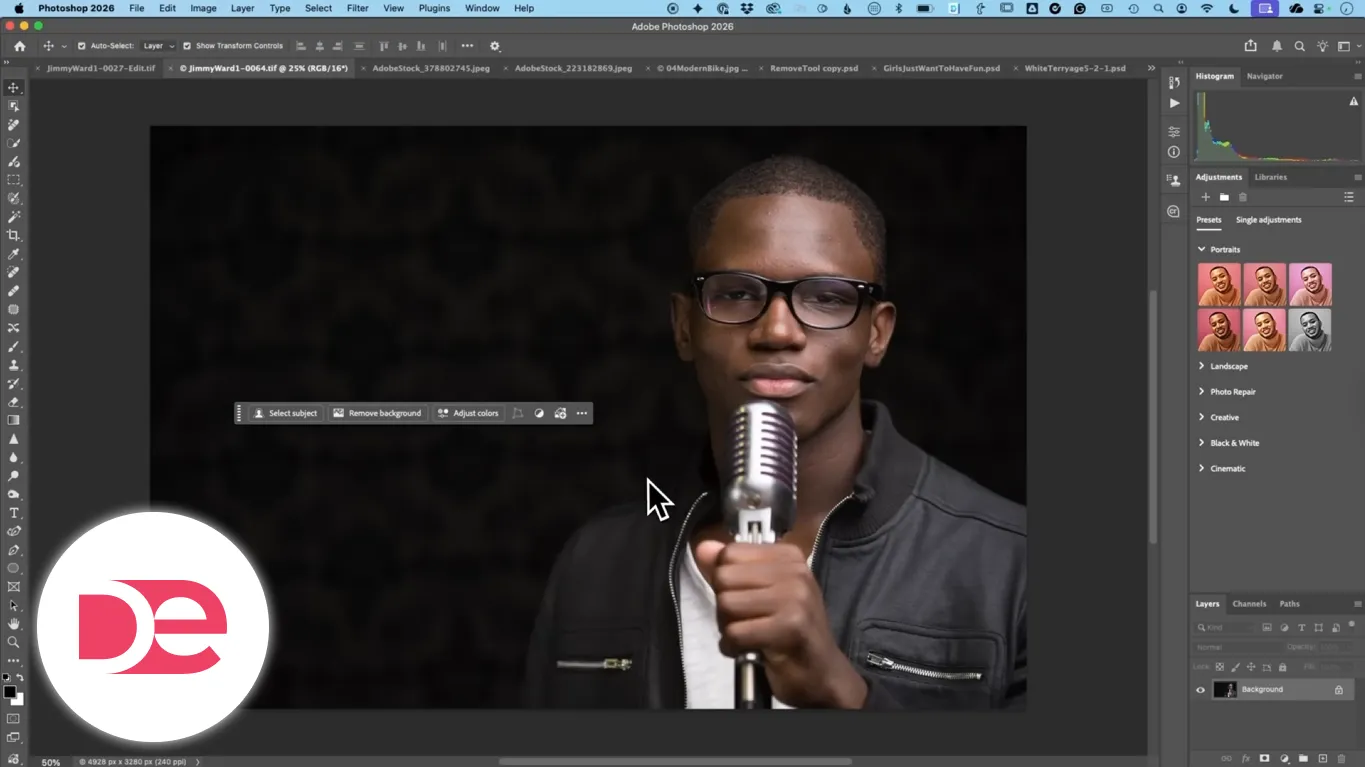
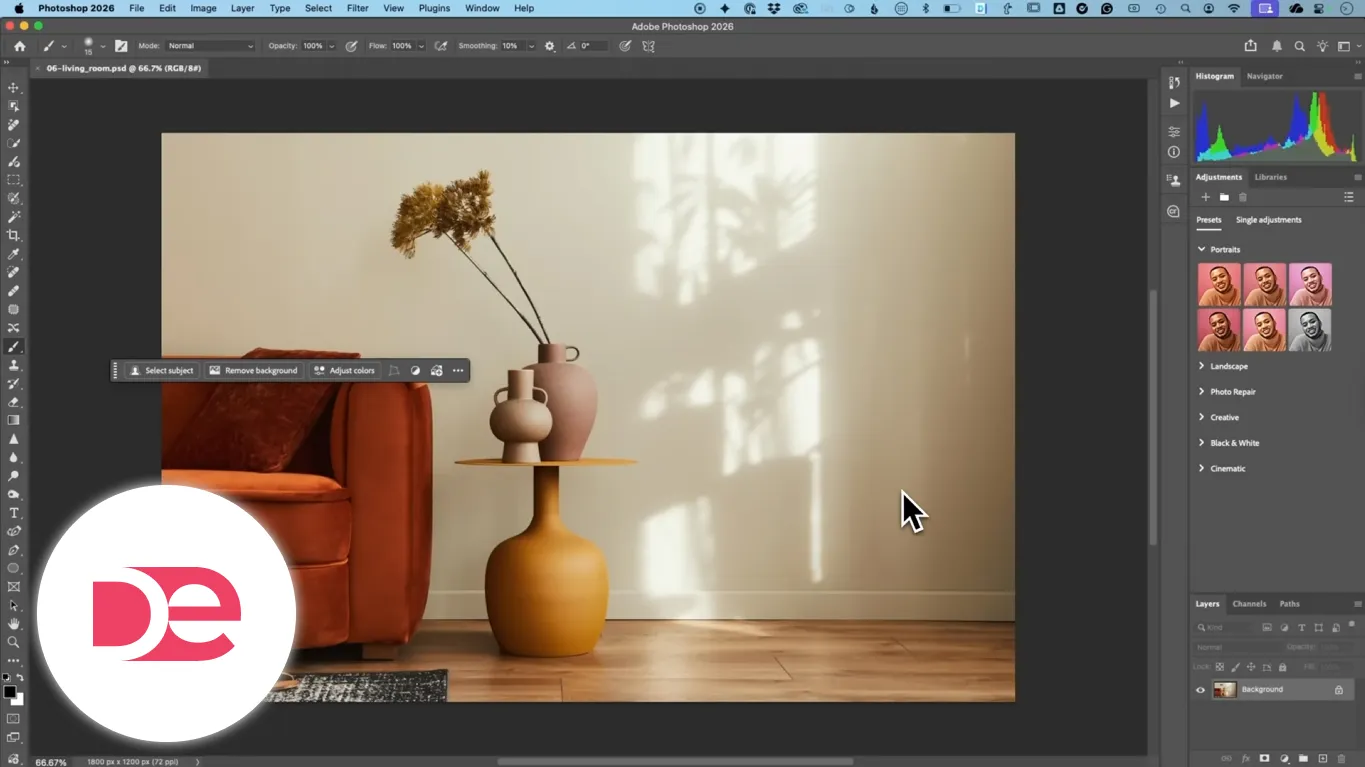
Select Subject got better on-device: how to choose device vs cloud
Select Subject and Remove Background now perform much better on-device, which matters when you want speed, privacy, or consistent behavior offline (when supported). You can still choose between device and cloud processing in settings.
Recommended setup for most users
1) Go to Settings/Preferences → Image Processing.
2) Locate the option that lets you choose Device vs Cloud for Select Subject/Remove Background.
3) Start with Device for quick iteration.
4) If you see missing details (thin spokes, hair edges, complex overlaps), switch to Cloud for a more careful pass.
Why this upgrade matters: Better on-device masking means fewer “unusable” results for complex subjects like bikes, wheels, or similarly colored backgrounds—while still giving you a mask you can refine.
The Remove tool is faster and cleaner: best settings for real work
The Remove tool’s AI behavior is improved in two practical ways:
• It processes faster
• It produces fewer “substitutions” (where it replaces an object with something else instead of removing it)
Workflow: Remove a large object (like a backpack) without chaos

1) Select the Remove tool.
2) Ensure Generative AI is enabled (if your UI exposes a toggle).
3) Consider turning off “process after each stroke/click” so you can mark multiple areas before running removal.
4) Paint/circle the object.
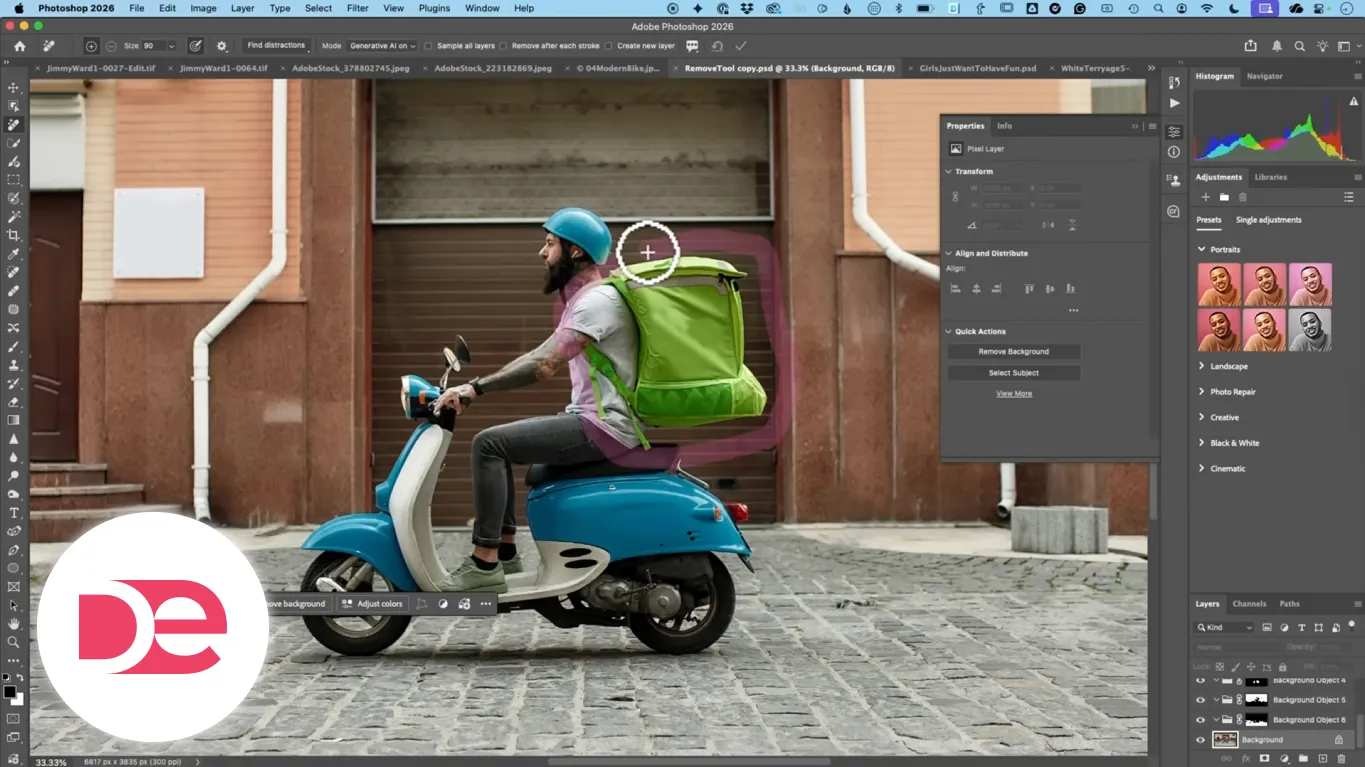
5) Run removal and inspect surrounding textures.

Alternate shortcut: Some selection tools now expose a Remove button in the Contextual Task Bar—useful if you already have a selection and want removal to respect it.
Common Remove tool pitfalls and fixes
• Symptom: The removed area looks “too perfect” or plasticky
• Cause: Texture synthesis smoothed detail
• Fix: Smaller strokes; remove in passes; reintroduce grain/noise subtly afterward
• Symptom: AI adds a new object instead of removing
• Cause: Model hallucination (reduced, but not eliminated)
• Fix: Undo and retry with a tighter selection; remove surrounding context first
Dynamic Text: a small feature that saves serious layout time
Dynamic Text is a new option in the Contextual Task Bar for text layers that makes your lines behave more like responsive typography: it tries to keep text aligned to a consistent width by adjusting character size/fit as you edit.
When to use it
• Ad headlines where you must fit a fixed space
• Two-line callouts that need consistent visual rhythm
• Quick social templates where copy changes frequently
How to use it effectively
1) Create or select a text layer.
2) Click Dynamic Text in the Contextual Task Bar.
3) Resize the text box and add words; watch how the layout adapts.
4) If a manual line break is required, insert it—Dynamic Text will still attempt to balance the line widths.
Generative Upscale with partner models: restore and enlarge without touching the original
Generative Upscale is designed for taking a small image (like an old scan) and making it larger for print or modern usage. A key workflow detail: the upscale result opens as a new image, leaving the original unchanged.
Workflow: Upscale an old photo scan for print-ready use
1) Open the low-resolution image.
2) Go to Image → Generative Upscale.
3) Choose the upscale factor (commonly 2× to 4×).
4) If available, enable Face Recovery for portraits.
5) Select a partner model option such as Topaz Gigapixel for detail preservation.
6) Run upscale; Photoshop generates a new document window with the result.
Model guidance:
• Choose a detail-preserving option when accuracy matters (faces, archival texture).
• Choose a more “creative detail” option when you’re intentionally stylizing (posters, illustrative looks).
Important check: Upscale can include optional retouching layers. Toggle them on/off to see if the softening helps or harms your intent.
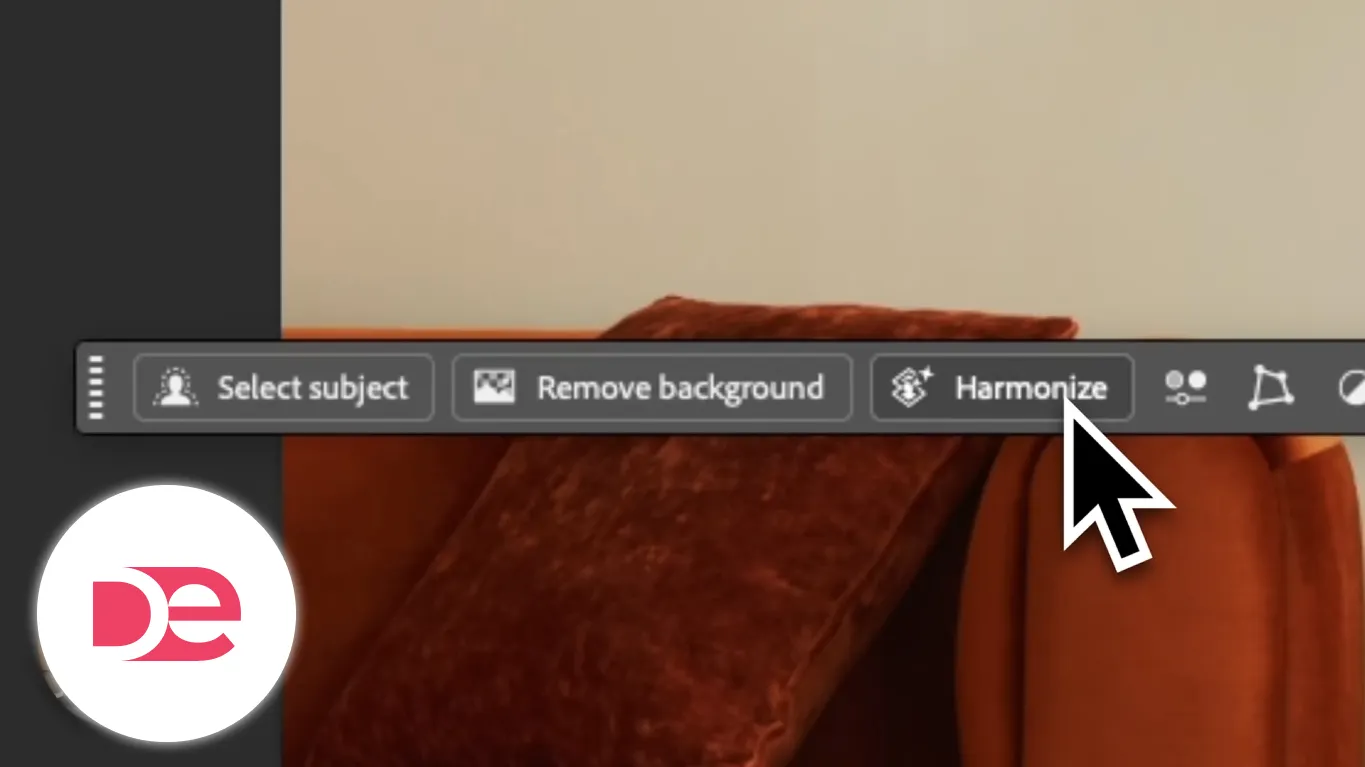
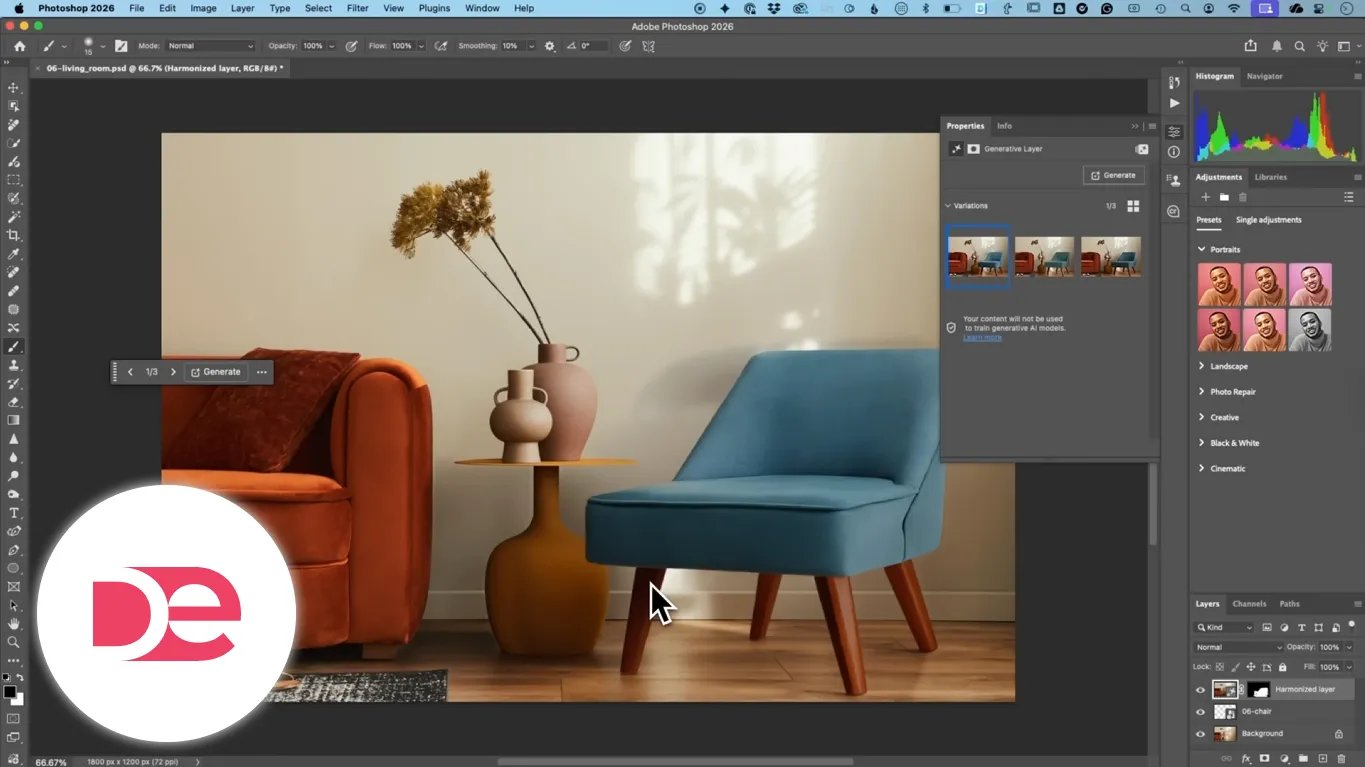
Harmonize is out of beta: the fastest way to make composites look real
Harmonize is built for compositing—when you place one image into another and it looks like it’s floating or “pasted on.” This feature automatically adjusts key realism cues:
• Contact shadows and grounding (legs on floor, object weight)
• Color and contrast matching
• Overall lighting coherence
• Multiple variations to choose from
Workflow: Place an object into a room and make it belong
1) Prepare your background scene (room, street, studio backdrop).
2) Drag in the object (chair, product, person). Background removal helps, but it’s not the whole battle.
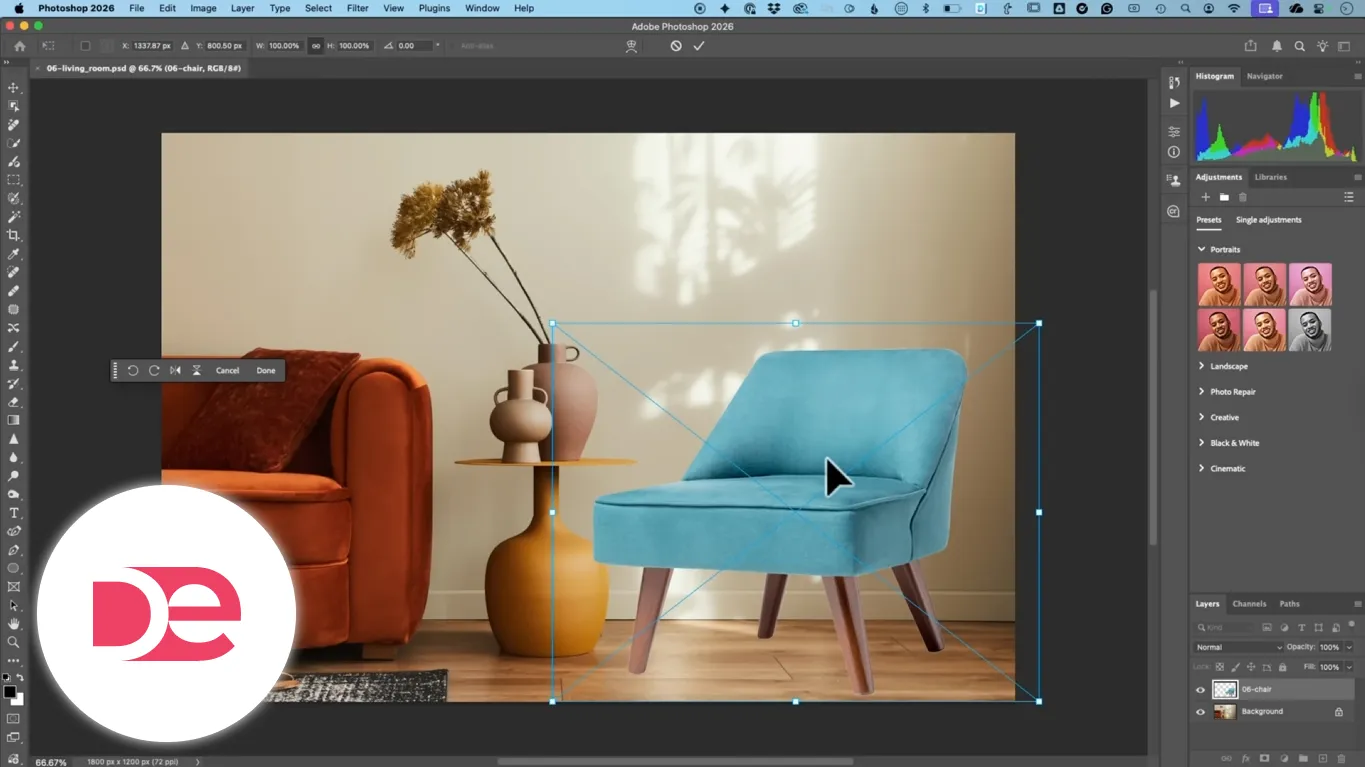
3) Position the object roughly where it should be.
4) Click Harmonize in the Contextual Task Bar.
5) Review variations and pick the most believable.
Reality check: Harmonize is not a substitute for good source images. If the lighting directions are wildly different, you may still need manual shadow work or additional compositing steps.
Generation history on the Home screen: why it matters for workflow
The Home screen now surfaces generation history, letting you reopen generated assets and continue refining them in Photoshop. Treat this as a workflow accelerator:
• Easier iteration across multiple drafts
• Faster retrieval of “almost right” generations
• More consistent project continuity when you’re exploring options
Best practice: Name and organize final outputs outside Photoshop as well—generation history is helpful, but it’s not a substitute for your own file structure.
Photoshop Beta: the experimental Fill/Expand model and how to use it safely
Photoshop Beta includes an experimental model described as improving Firefly-based Generative Fill and Generative Expand behavior. Because it’s a Firefly model, you may get multiple variations, which can help when you’re exploring extended crops or background expansion.
Workflow: Expand a crop using the experimental Fill/Expand model
1) Install and open Photoshop Beta from Creative Cloud.
2) Open your image and select the Crop tool.
3) Expand the crop bounds outward (use Alt/Option to expand from center if needed).
4) Choose Generative Expand.
5) Switch the model to the experimental Fill/Expand option.
6) Generate and review variations.
What to do when you see obvious artifacts
Experimental outputs can include mistakes (for example, stray limbs or inconsistent anatomy). When that happens:
• Pick the best variation if one is workable
• Regenerate if needed
• Use built-in reporting/feedback mechanisms in the beta workflow when you encounter clear errors
A practical mini case study: a three-pass workflow for a marketing composite
Here’s a repeatable process you can use for product promos, creator images, or ad creative—without relying on a single “magic” generation.
Scenario
You have a subject photo that’s almost perfect, but the pose angle is wrong, the background needs cleanup, and the final graphic needs to fit a fixed headline space.
Pass 1: Fix the subject orientation (identity first)
• Use Generative Fill with a consistency-focused partner model
• Prompt for the pose change and preserve key constraints (hands, gaze direction)
Pass 2: Clean distractions (believability second)
• Use the improved Remove tool to eliminate bags, logos, clutter
• Work in smaller passes to preserve texture
Pass 3: Make it ad-ready (layout third)
• Use Dynamic Text for the headline block so copy changes don’t break design
• If signage or label text must change, switch to a text-focused model, then refine with real type layers
Why this works: You’re separating tasks by what the AI is best at, reducing the chance that one generation ruins multiple elements at once.
Troubleshooting: symptoms → likely cause → fix
Generative Fill “looks right,” but the person doesn’t look like the same person
• Cause: Model drift; prompt too vague; selection includes too much background
• Fix: Tighten selection around the subject; specify identity constraints (“maintain facial features,” “keep hairstyle”); try a consistency-oriented partner model
You only get one result and it’s not usable
• Cause: Some partner models provide fewer variations
• Fix: Make your prompt more explicit; regenerate; consider switching to Firefly for exploration, then partner model for the final
Text is almost correct, but spacing or letters feel off
• Cause: Typography is inherently precise; AI approximations show up in kerning and shapes
• Fix: Use AI for the sign surface and lighting, then rebuild final letters with editable type layers
Remove tool leaves smears or repeating patterns
• Cause: Large strokes over complex texture
• Fix: Remove in smaller segments; sample adjacent texture by limiting the selection; finish with subtle grain/noise matching
Select Subject misses thin details (spokes, cables, hair wisps)
• Cause: Edge complexity and low contrast
• Fix: Switch to cloud processing; refine mask manually; use Select and Mask for edge improvement
Generative Expand creates weird anatomy or random objects
• Cause: Expansion uncertainty; experimental model artifacts
• Fix: Choose a better variation; regenerate; reduce expansion amount; report obvious errors in beta workflows
Limitations, costs, and practical safeguards
Generative credits and model cost
Partner models can consume significantly more generative credits than Firefly. If you’re iterating a lot, adopt a two-stage approach:
• Stage 1 (explore): Firefly or cheaper runs to test composition
• Stage 2 (commit): Partner model for consistency or text accuracy
Regional availability
Features and model availability can vary by geography. If you don’t see a model listed, confirm you’re updated and check whether your region has access.
Accuracy and verification
AI can produce plausible mistakes. For professional work, build a verification habit:
• Zoom to 200% on faces and hands
• Check text character-by-character
• Look for shadow direction consistency in composites
• Confirm edges on masks before exporting
FAQ
Next steps: build your “AI-first” Photoshop workflow without wasting time
Start by updating to Photoshop 2026 (v27) and testing three quick scenarios: rotate a subject using a consistency-focused partner model, remove a distracting object with the faster Remove tool, and run Generative Upscale on a small scan with face recovery enabled. Once you know what works reliably for your images, lock in a repeatable process: explore cheaply, commit with the best model for the job, and verify at high zoom before export. If you want even more control, install Photoshop Beta and experiment with the Fill/Expand model—just treat it as experimental and review artifacts carefully.
Get Photoshop and start using these AI workflows today